
How to Sync Apple School Manager with Jamf: A Step-by-Step Guide
In the modern educational landscape, managing a fleet of Apple devices—be it iPads for students or MacBooks for staff—is a critical task. The key to a seamless, automated, and scalable deployment is achieving an effective MIS to Apple School Manager to JAMF Synchronisation, which relies on the powerful integration between these platforms.
This integration is not just a convenience; it’s the foundational step that transforms a box of new devices into powerful learning tools, ready for the classroom with minimal manual intervention. By syncing ASM with Jamf, you automate device enrolment, distribute apps and books effortlessly, and import user and class data to personalise the learning experience.
This guide will walk you through the essential steps to connect these two platforms.
Prerequisites
- Before you begin, ensure you have the following:
- Administrator access to your institution’s Apple School Manager portal.
- Administrator access to your Jamf instance.
The integration between Apple School Manager and Jamf process can be broken down into three core components:
- Automated Device Enrolment: For zero-touch device setup.
- User and Class Data Sync: For populating Jamf with students, staff, and class rosters.
Part 1: Connecting for Automated Device Enrolment (ADE)
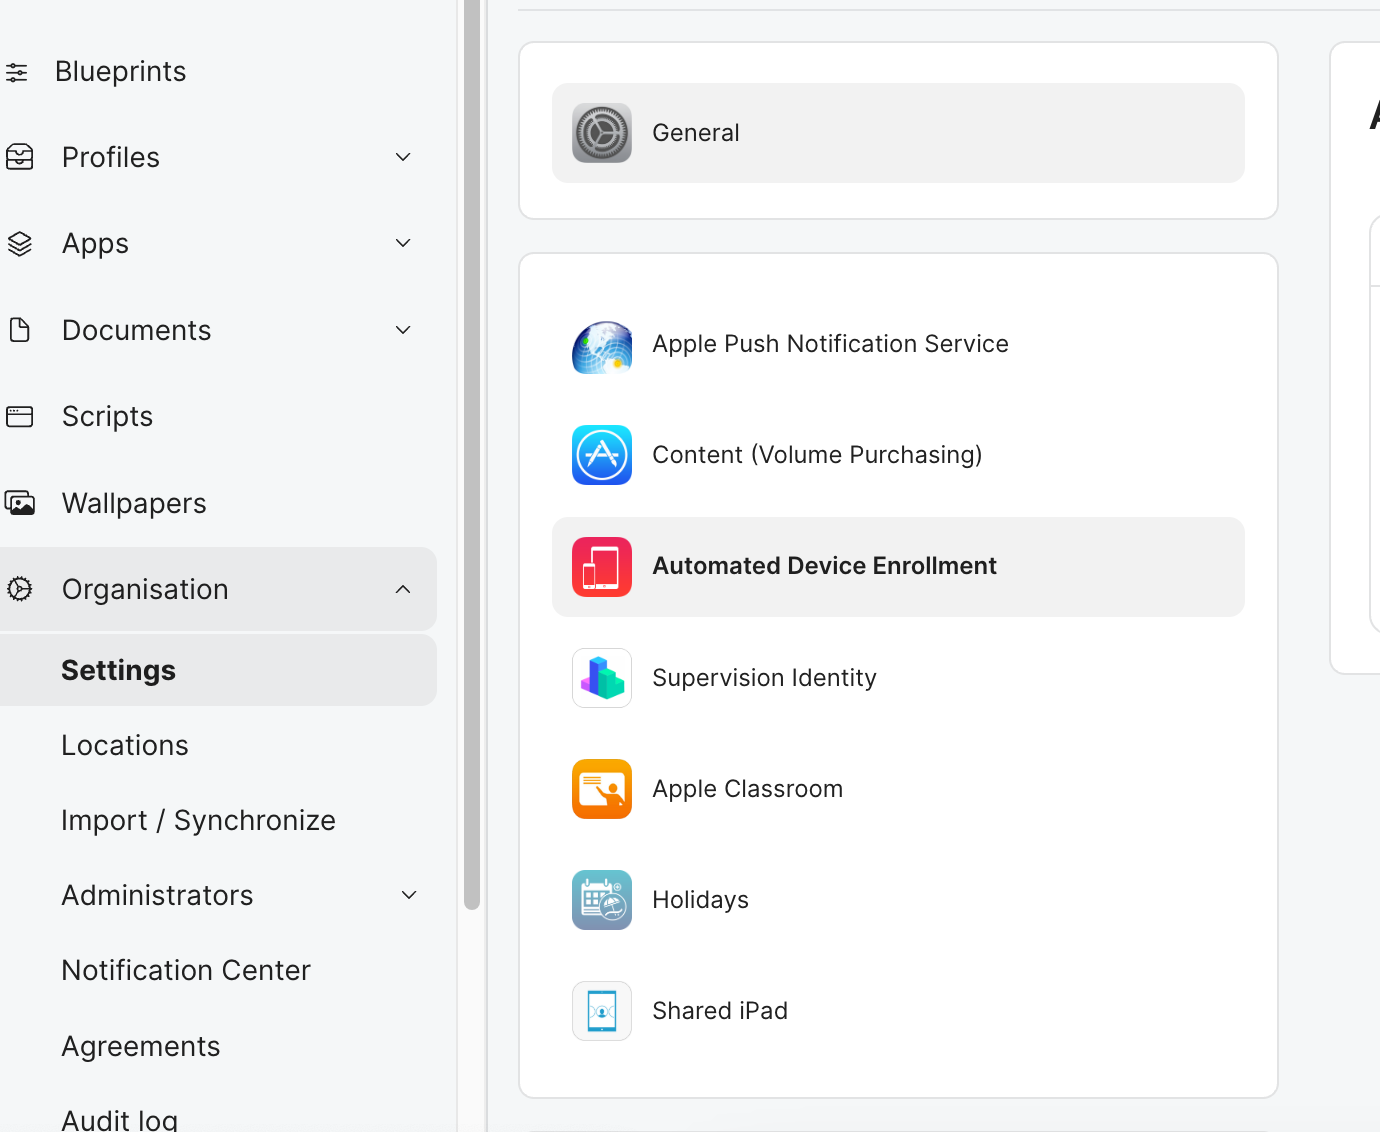
Step 1: Download the Public Key from Jamf
- Log in to your Jamf server.
- Navigate to Organisation > Settings > Automated Device Enrolment.
- If you don’t have an instance configured, click + Apple School Manager.
- Click Download Public Key. Save the file, which will have a .pem extension.
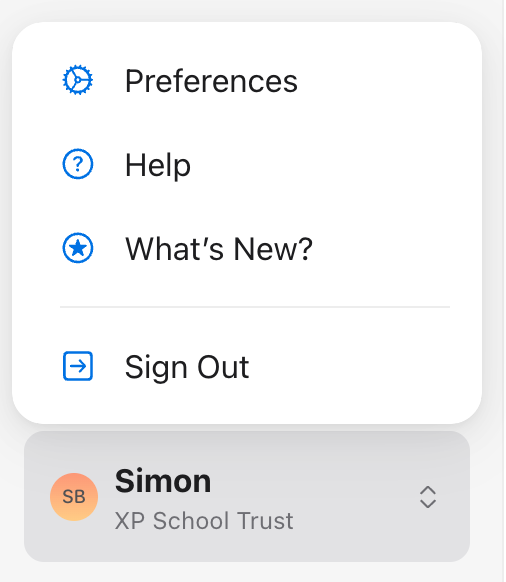
Step 2: Create an MDM Server in Apple School Manager
- Log in to Apple School Manager.
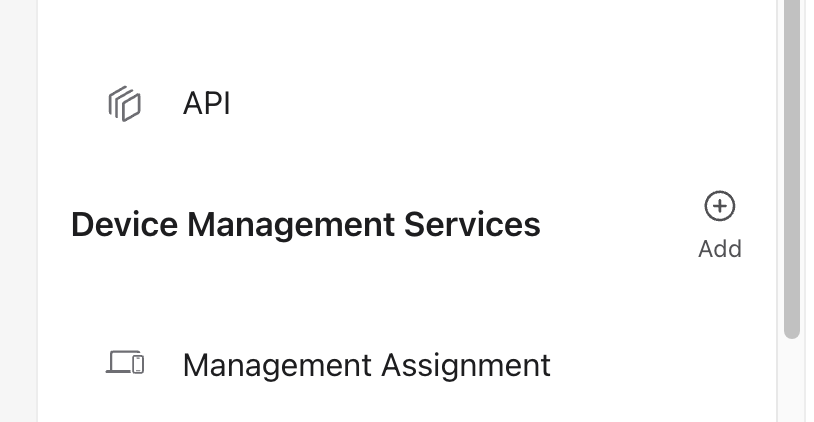
- Navigate to Preferences .
- Click “Add” next to Device Management Services.
- Give your MDM server a descriptive name, such as “Jamf Production Server”.
- Click Upload File… and select the .pem public key you downloaded from Jamf.
- Click Save.
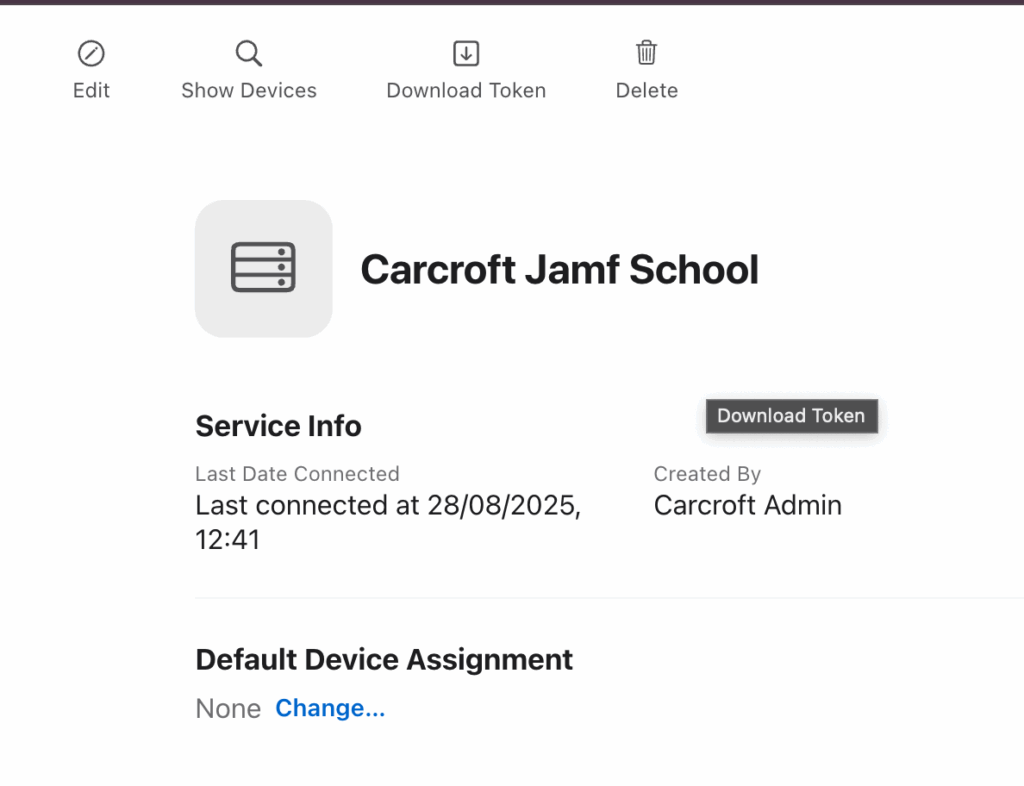
Step 3: Download the Server Token from ASM
- After saving, stay on the same page in Apple School Manager.
- Click Download Token for the MDM server you just created. This will download a file with a .p7m extension.
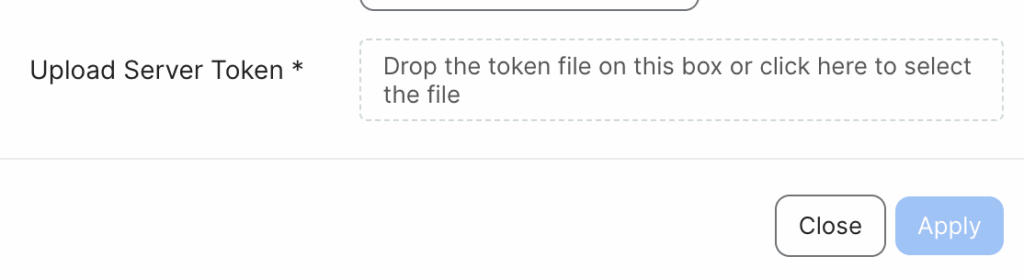
Step 4: Upload the Server Token to Jamf
- Return to your Jamf instance, in the same Automated Device Enrollment settings section.
- Click Edit on your newly created instance.
- Click Upload Server Token File and select the .p7m file you just downloaded from ASM.
- Click Save.
Your Jamf server is now trusted by Apple School Manager. The final step is to assign your devices in ASM to this new server so they know where to enrol. You can do this by device serial number, order number, or set a default assignment for all future purchases.
Part 2: Syncing User and Class Roster Data
This is arguably the most powerful sync for an educational environment. By connecting your Student Information System (SIS) to ASM (or by uploading data via SFTP), you can then sync all your students, teachers, and class rosters directly into Jamf. This enables features like Shared iPad and empowers teachers to use Apple’s Classroom app.
Step 1: Ensure Data is Populated in Apple School Manager
- Before connecting Jamf, you must have your user and class data in ASM. You can achieve this by:
- Connecting your SIS: ASM supports direct integration with popular MIS providers like PowerSchool and Infinite Campus.
- SFTP Upload: You can export data from any MIS into Apple’s specified CSV format and upload it via SFTP.
- If you are based in the UK you can automate this process with an Apple Sync product, such as the one we provide at realsmart.
- Verify that your users and classes appear correctly in the ASM portal before proceeding.
Step 2: Enable Apple Education Support in Jamf
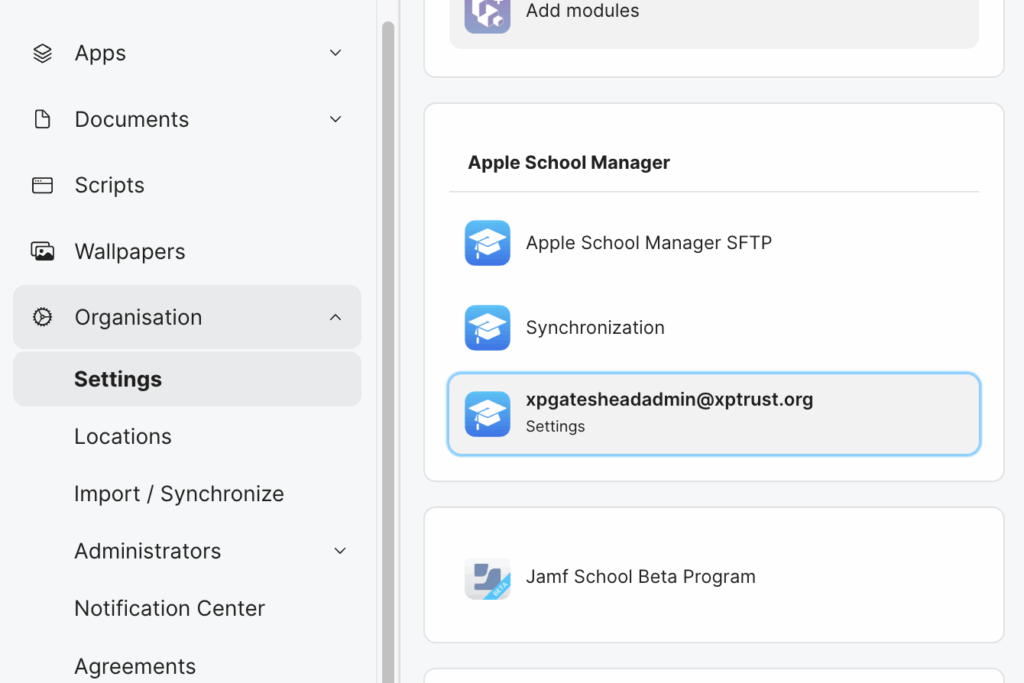
- In Jamf, navigate to Organisation > youremail@domain.com
- Check the box “Enable synchronisation of managed Apple IDs with Apple School Manager.
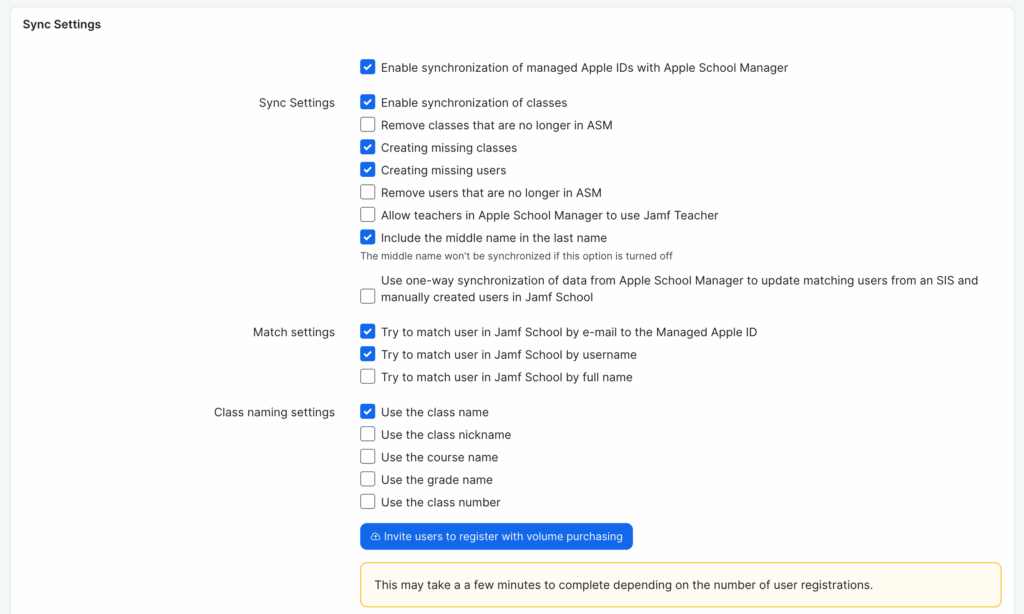
- You can then customise your options for the sync, there is an example screenshot below.
- All of the settings are important and will be different for every user.
- Under “Location Mappings” around half way down the screen, you will see a list of Apple School Manager Locations on the left of the screen, and a drop down with your desired Jamf MDM location on the right.
- Match these Locations and MDMs up as required.
- For instance you may have locations in Apple School Manager that you do not want to sync to this Jamf instance.
- Click Save.
- Jamf will now reach out to Apple School Manager and begin its first sync.

Step 3: Configure and Monitor the Sync
- On the same settings page, Jamf will display the sync status. The initial sync can take some time depending on the amount of data.
- You can configure the sync schedule (e.g., daily) to automatically pull in any changes from ASM, such as new students or updated class rosters.
- You can also perform a manual sync by clicking the Sync Now button.
- Once the sync is complete, you will see all your ASM users and classes populated within the Users and Classes sections of Jamf, ready to be used in configuration profiles and policies.
How We Can Help
Here’s how we at Realsmart can help you save time and ensure data accuracy across Apple School Manager (ASM) and Jamf.
We eliminate the time-consuming and error-prone process of manually managing your school’s data. Our service acts as a secure bridge, automatically syncing user, class, and roster information directly from your MIS to Apple School Manager. This ensures that ASM always has an up-to-date and accurate reflection of your school’s data, creating Managed Apple IDs and classes without your IT staff having to touch a single spreadsheet.
This directly improves your Jamf setup. Jamf automatically uses the accurate user and class information from Apple School Manager, ensuring devices are correctly assigned, class groups are pre-built, and apps go to the right people from day one. This automation helps you manage your Apple devices with greater efficiency and confidence.